
Instructions for B 346.3 Virtalähde video recording studio
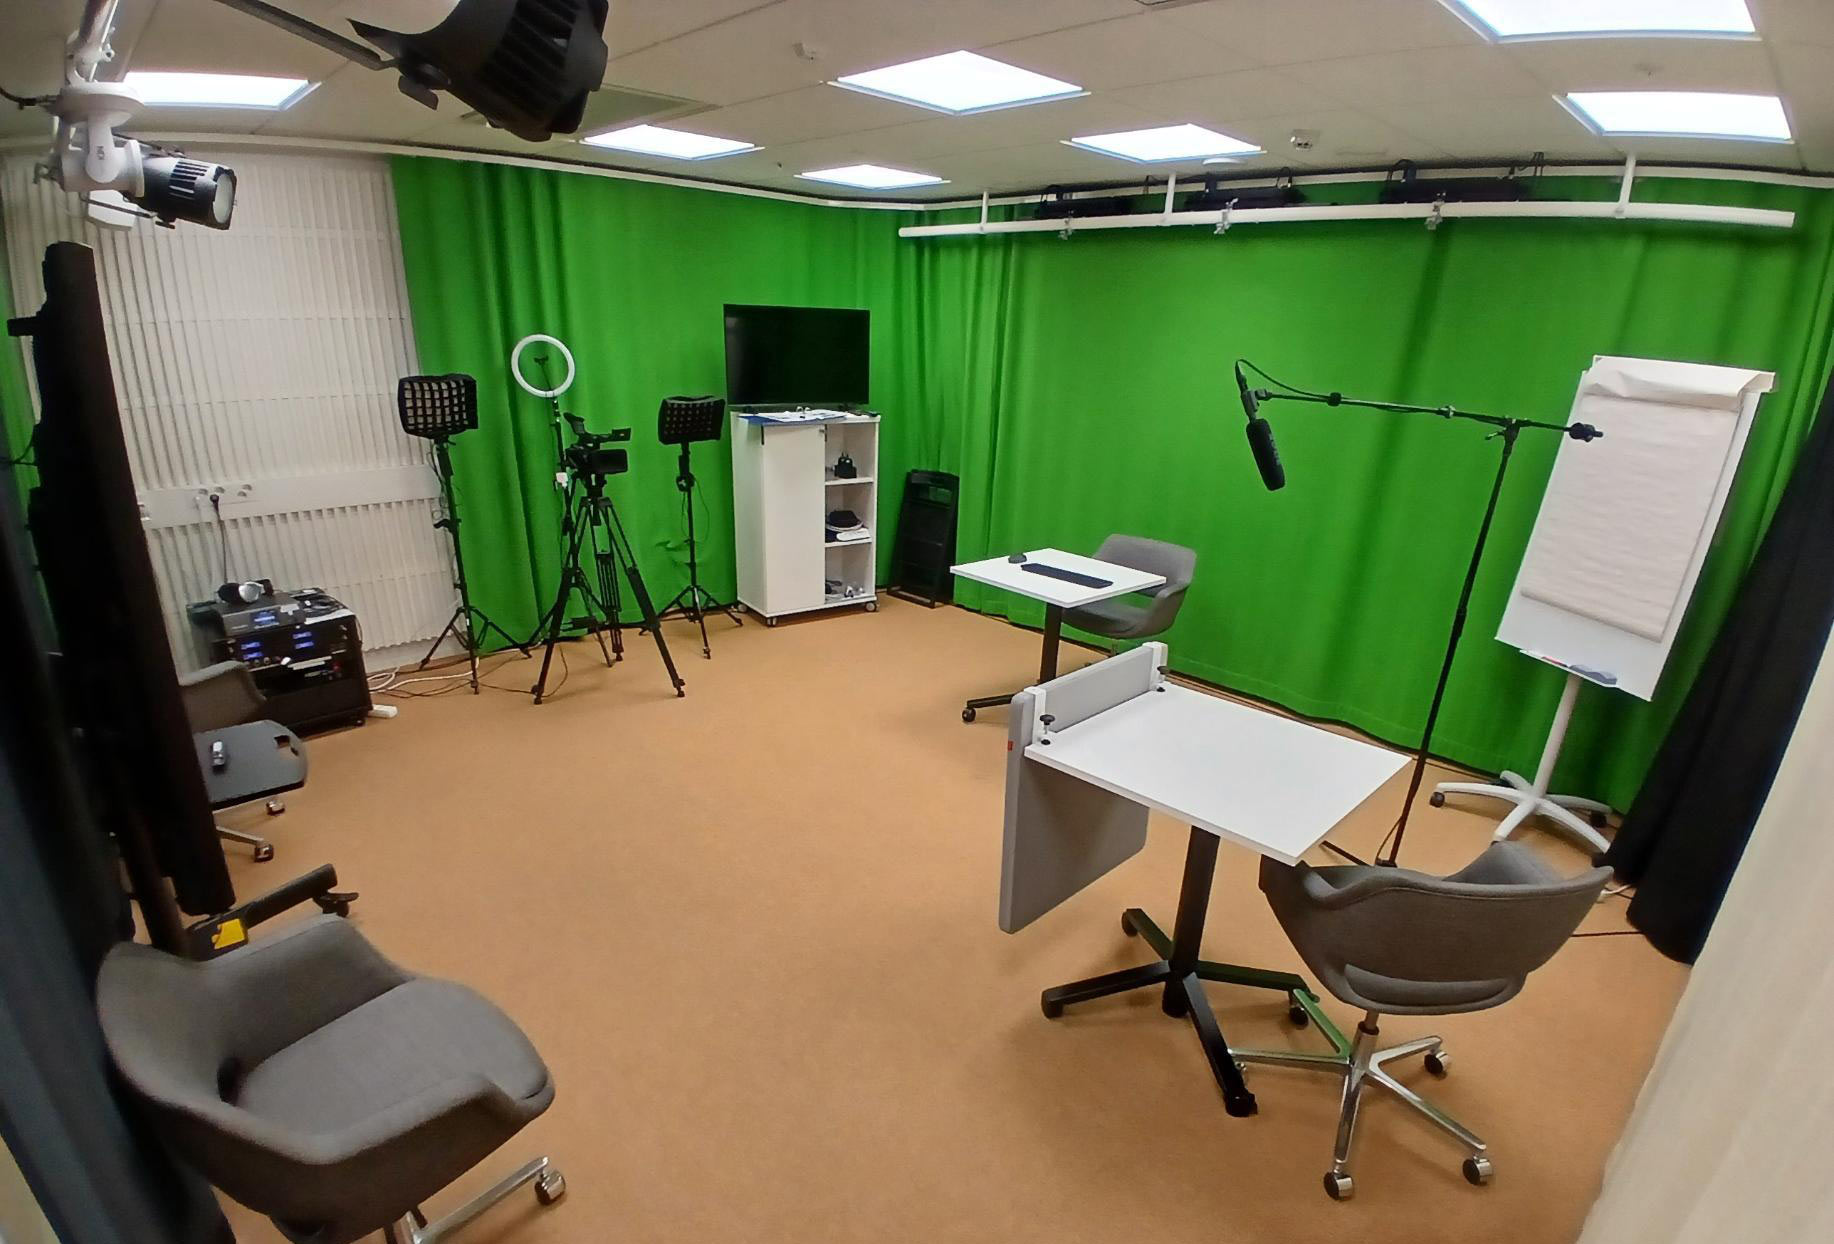
Welcome to Virtalähde studio. Virtalähde is a studio space designed for video and podcast productions located on the third floor of Lähde library. It is equipped with up-to-date technical solutions that flexibly adapt to different needs.
Staff can book the studio space through the KOVS system at https://kovs.jyu.fi. The electric key is picked up from the janitors' desk on the 1st floor of Lähde and returned to the same place after use.
General operating instructions
The studio space is available for University of Jyväskylä staff according to the opening hours of the Lähde building.
- Do not bring food or drink into the studio
- Do not disconnect cables or change the device settings
- In case of problems, send a support request to video support via the HelpJYU service: https://r.jyu.fi/tilatallennuksentuki
- In urgent cases, call the video support: 029 441 8016 (weekdays 9:00 a.m. to 4:00 p.m.).
- Whenever you leave the premises, make sure that the studio door is locked.
- Turn off screens and lights when finished. There is no need to turn off the computer and the Epiphan video recording device, just log out of the computer.
- During the reservation, you are responsible of the studio equipment - do not let outside persons into the studio.
In order for as many people as possible to use the studio, reservations can be made for a maximum of two days per week per user/course. If you need to book more studio time, please contact video support.
By default, Virtalähde is a self-service studio, which means that there are no video support people present, but if requested separately and schedules allow, we will be happy to advise and help to start the recording.
When you arrive at the studio
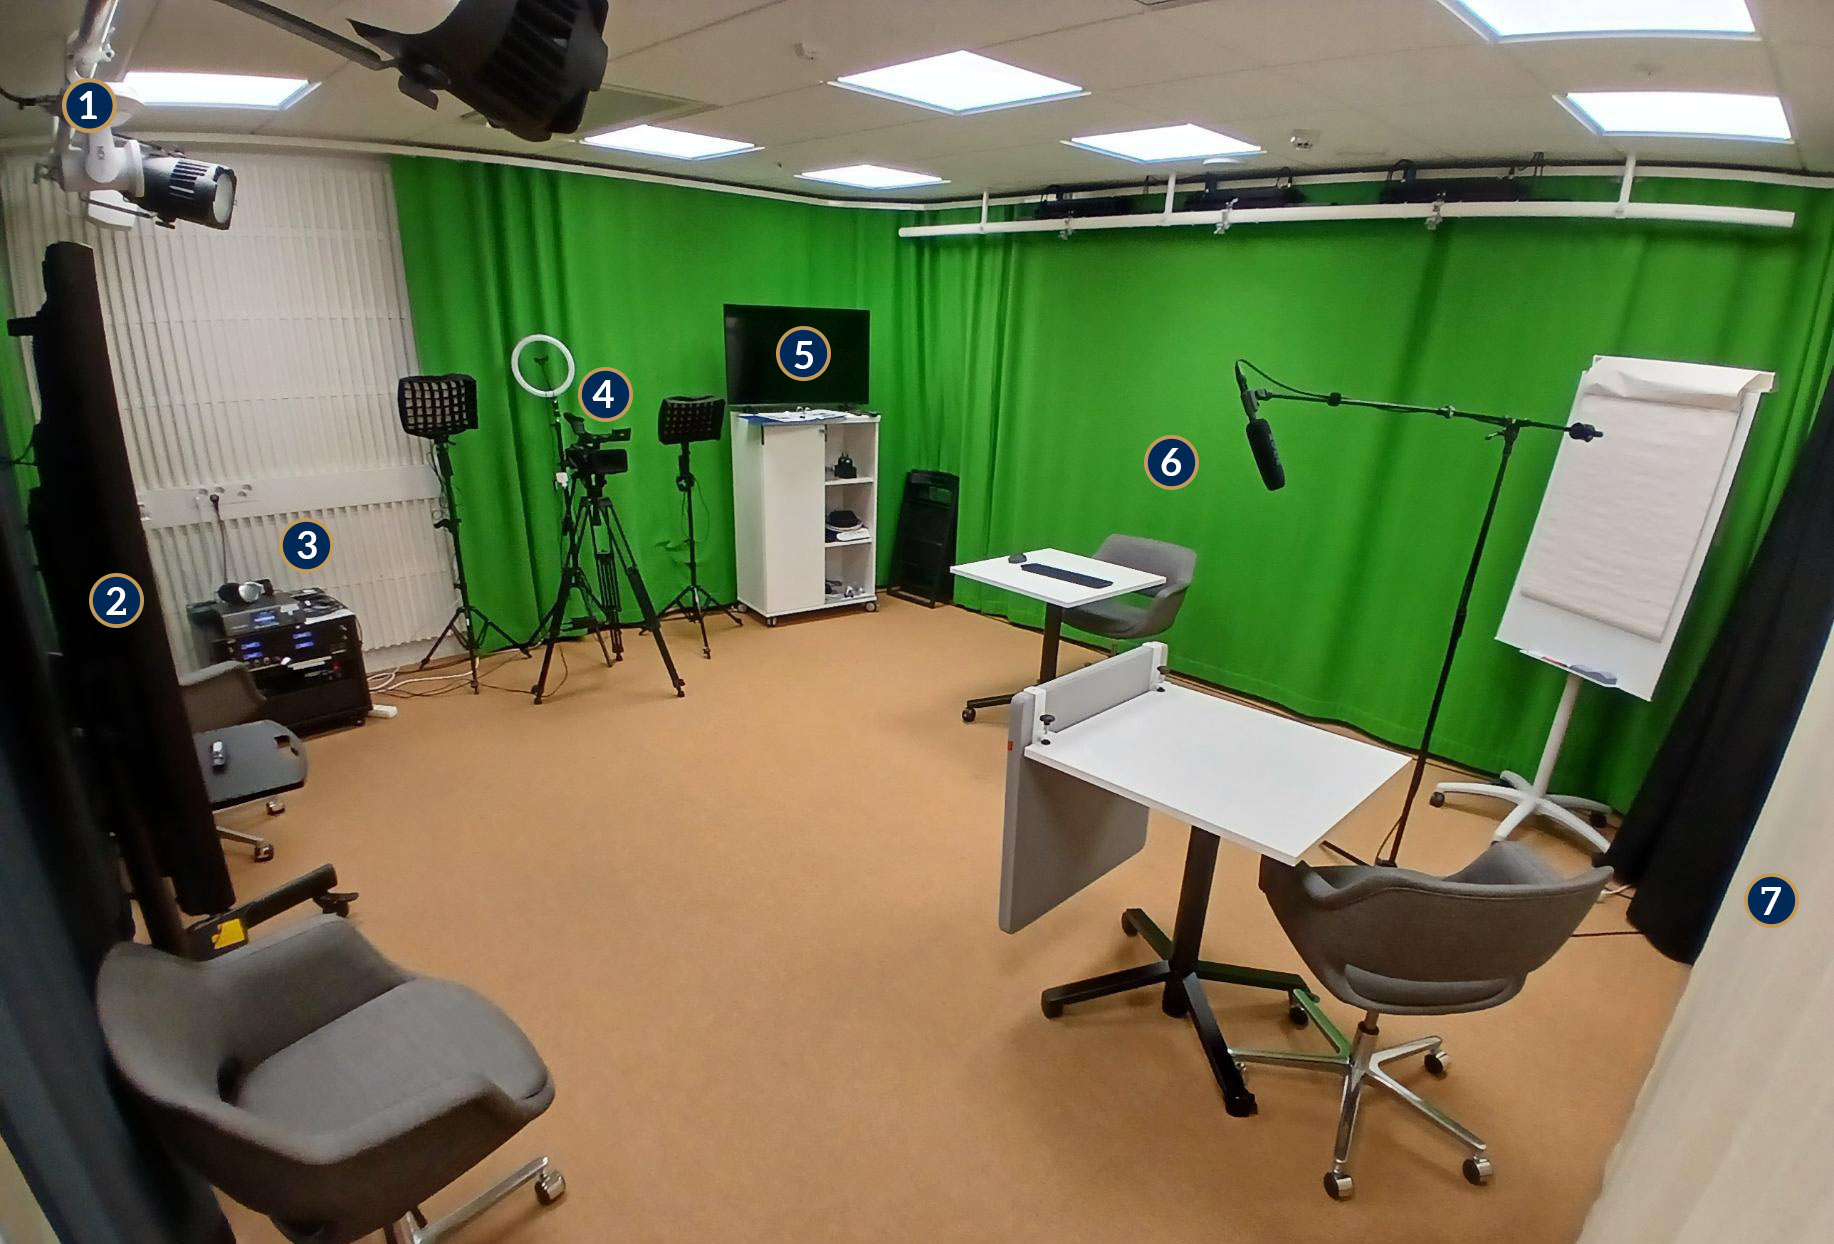
1. Remote-controlled green screen camera
2. Vestel touch screen
3. Equipment rack
4. Panasonic studio camera on a tripod
5. Samsung display (for monitoring the video you're recording)
6. Green Screen
7. Backdrop wall with a black or a white background curtains.
You can also explore the studio in a virtual environment (the link opens a ThingLink view in a new tab):
Virtalähde Studio in a 360° Virtual Environment
The studio is equipped with two movable, height-adjustable desks and chairs that can be used as needed during recording sessions. Please remember to return any moved desks and chairs to their original locations after use.
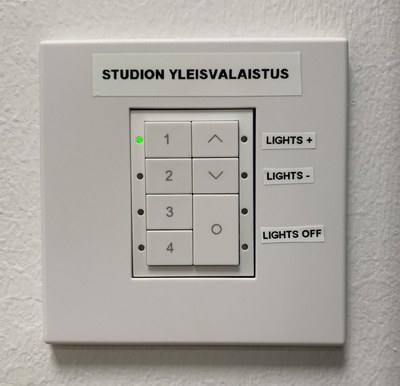
The studio's general lighting turns on automatically when you enter the room, but you can adjust the brightness using the lighting controls located by the door. In addition to four preset lighting modes, you can manually adjust the brightness using the arrow buttons. Please note that when using the green screen, the lights should be set to the brightest setting (1). When leaving the studio, please switch off the lights.
1. Getting started
Cameras, monitors and lights
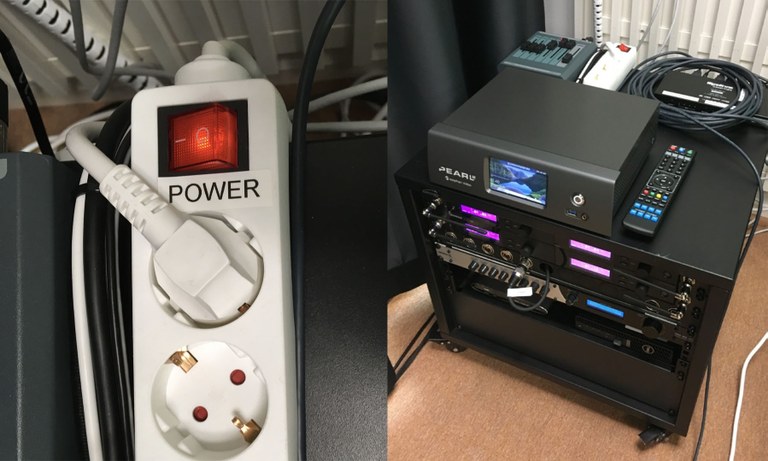
Turn on the power for the camera and studio lights by using the POWER switch, located on top of the equipment rack. Press the touch screen of the Epiphan recorder, and it will wake up from hibernation.
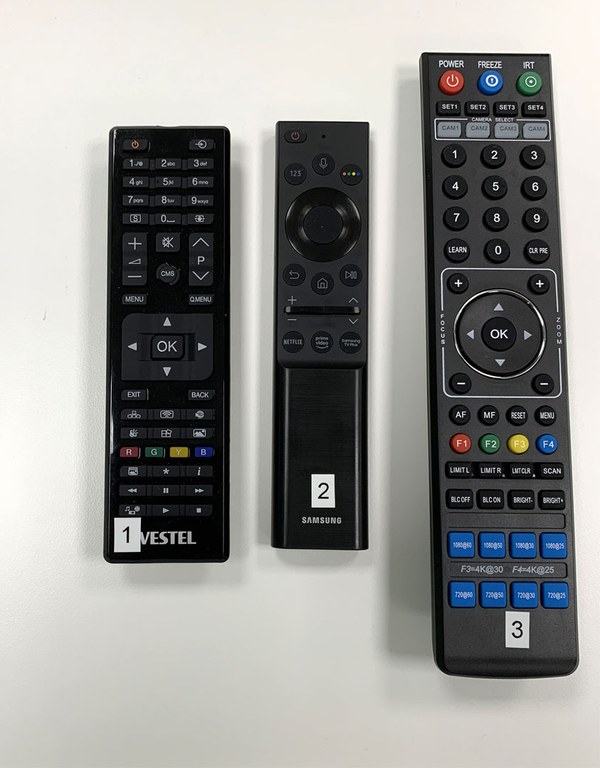
There are three numbered remote controls in the studio. They are used for controlling the Vestel touch screen (1), the Samsung monitor (2) and the Green Screen camera (3).
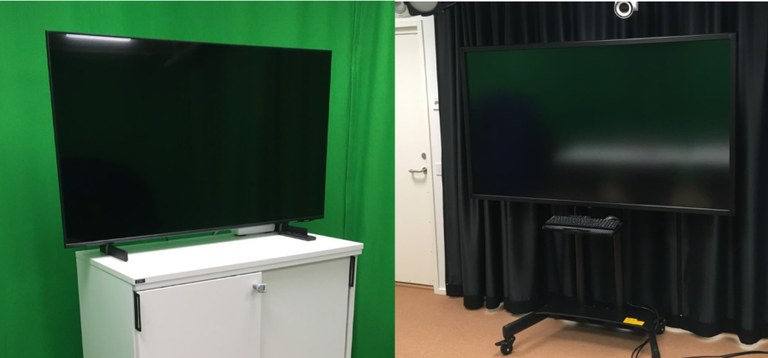
Turn on the required monitors with remote controls 1 and 2. From the smaller Samsung-branded screen, you can monitor the image that is currently being recorded. The larger Vestel-branded screen (on movable stand) can be used for presenting educational material, for example. Also on this larger screen, if you want, you can monitor the image being recorded (for example, when you're shooting in front of the Green Screen background).
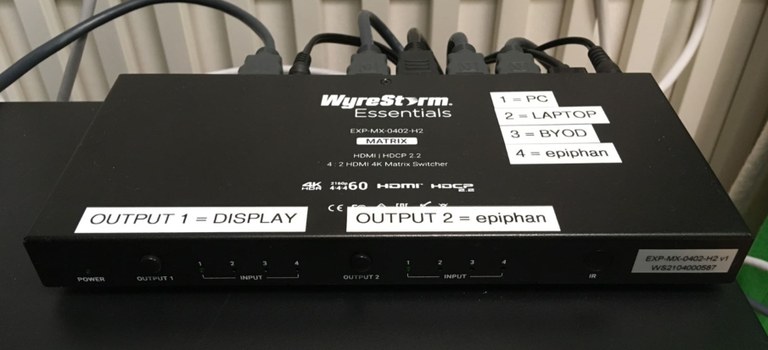
On top of the equipment rack, there is a Wyrestorm-branded video switcher. It is used to separately select which image is displayed on the Vestel screen and which image is being recorded. The button on the left switches the image on the screen (OUTPUT 1) and the button on the left switches the image to be recorded (OUTPUT 2). The LEDs on the front panel show which one of the four image sources is selected. Each button press switches to the next source.
Place the camera(s) in a suitable position in the studio, depending on the shooting direction. Check that the image is showing on the recorder's touch screen and on the monitor. You can move the Vestel touchscreen display on its wheels to a suitable location as needed (see Example 1 for more detailed instructions on using the touchscreen). The Vestel display's anti-glare screen panel also makes it well suited for situations where you want to film with the camera facing the display.
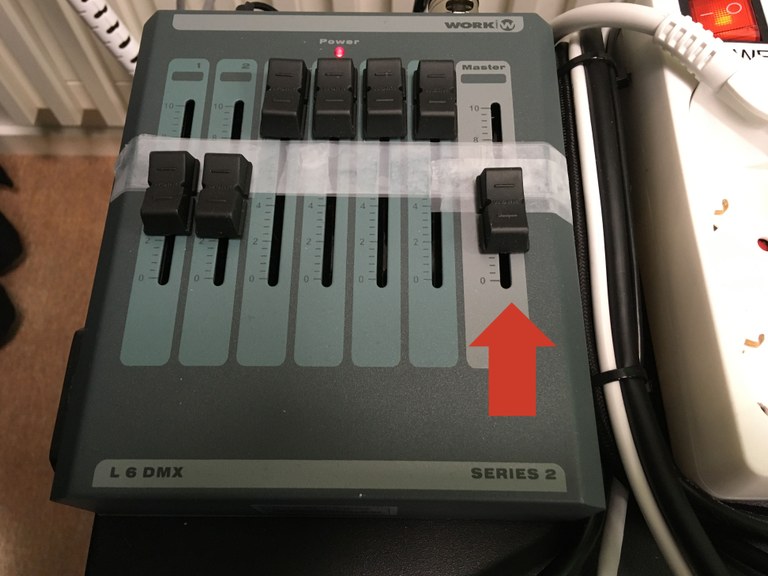
When shooting against the Green Screen wall, ceiling-mounted studio lights are used as additional lighting. The balance of the lights is already set, but make sure that the rightmost "Master" slide is raised to the level marked with tape.
More about using the Green Screen wall in Example 2.
Sound
Audio can be recorded in two ways:
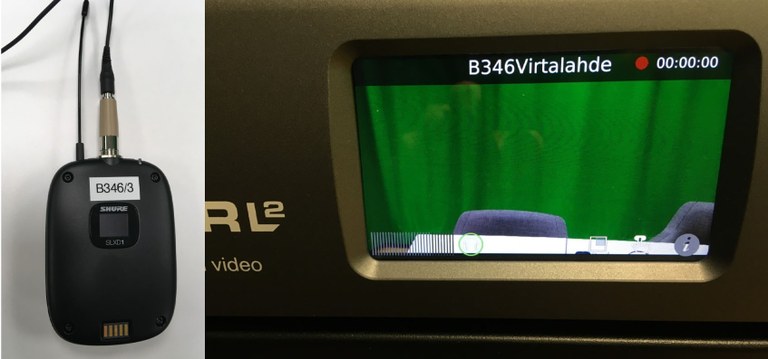
Wireless headset microphones (4 units), available in the charging docks located on the top shelf of the white cabinet.
- Place the microphone on your head and switch on the transmitter using the power switch located on the top of the unit.
- After use, turn the microphone off and return it to the charging dock.
- Only use as many microphones as there are speakers.
- To minimize interference and unwanted noise, avoid touching the microphone cable during recording.
Overhead microphone (1 unit), which must be positioned near the speaker while remaining outside the camera frame.
- The overhead microphone is powered on using the power switch located in the equipment rack.
Please note that the studio does not have any microphones that switch on automatically. If the studio user does not manually power on the microphones, no audio will be recorded. For this reason, always check before recording that the audio level meter on the recording device responds to speech and moves in sync with the speaker's voice.
2. Recording
The videos are recorded with Epiphan recording device, situated on top of the equipment rack. The device is used with the touch screen on the front. You can choose the camera image being recorded, and several different image layouts.
Do the following steps before starting the recording:
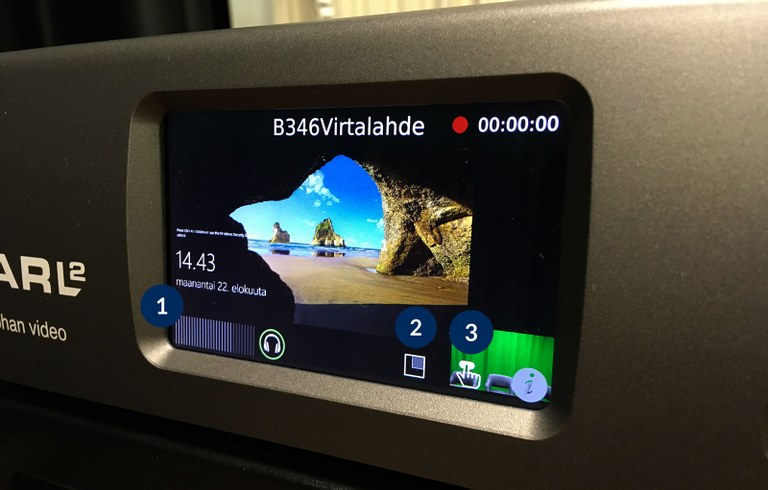
1. Make sure that the michrophone is working and the sound level meter is moving when speaking.
2. Change the image layout if necessary (see detailed instructions later on this page)
3. Open the recording view.
Choosing the image layout
You can choose the image layout that suits the situation. The options are video feeds from different cameras, different combinations of computer and camera images, and the green screen function. Open the layout selector by pressing the "square icon" in the start screen. It is also possible to change the layout during recording.
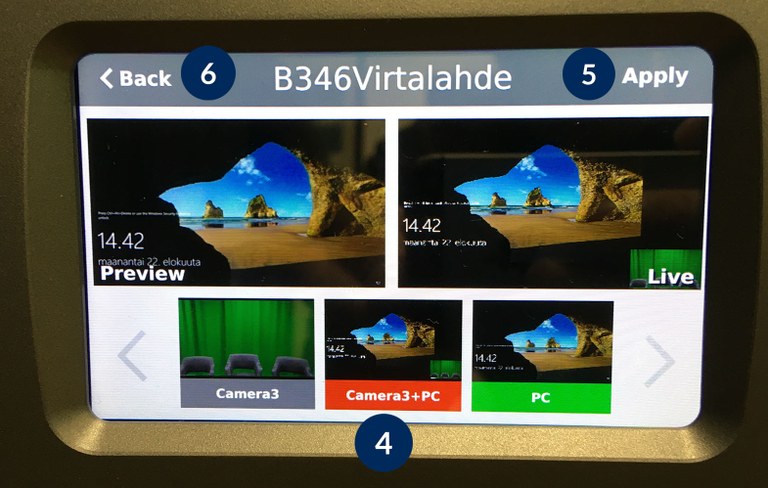
4. First, select the layout you want to use by pressing one of the preview images in the bottom row. The image appears in the upper left box (Preview).
5. Confirm the choice of image layout by pressing "Apply" in the upper right corner. The preview image moves to the right side "Live" box.
6. Return to the start screen by pressing "< Back". The image you see in the start screen, is the image that is being recorded.
Starting the recording
When you are ready to start recording, open the recording view ("Launcher") by pressing "finger icon" on the start screen (see spot 3 in the picture earlier):
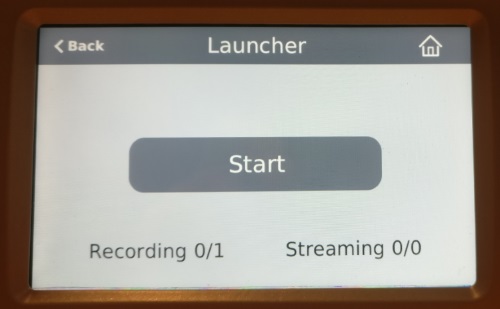
Press "Start" to start recording. Recording has succesfully started, when the "Stop" button appears on the screen and there is a text "Recording 1/1" on the lower left. Now it is possible to return to the start screen by pressing "< Back".
When you are ready to stop recording, press "Stop". You can start recording again at any time, and a new separate video file will be created.
NOTE! There is a small delay of approx 1 second before the recording starts/ends after pressing the touch screen.
Publishing the recorded video
When the recording has finished, send a publishing request to Video Support using the following HelpJYU form:
http://r.jyu.fi/tilatallenteenjulkaisu
Video Support processes you're request as quickly as possible, and publishes the video in Moniviestin. If you want to edit the video yourself before publication or if you want the video file in MP4 format, you can tell it using the same form.
3. Examples of using the studio
Example 1. I want to film an educational video, a discussion or a speech
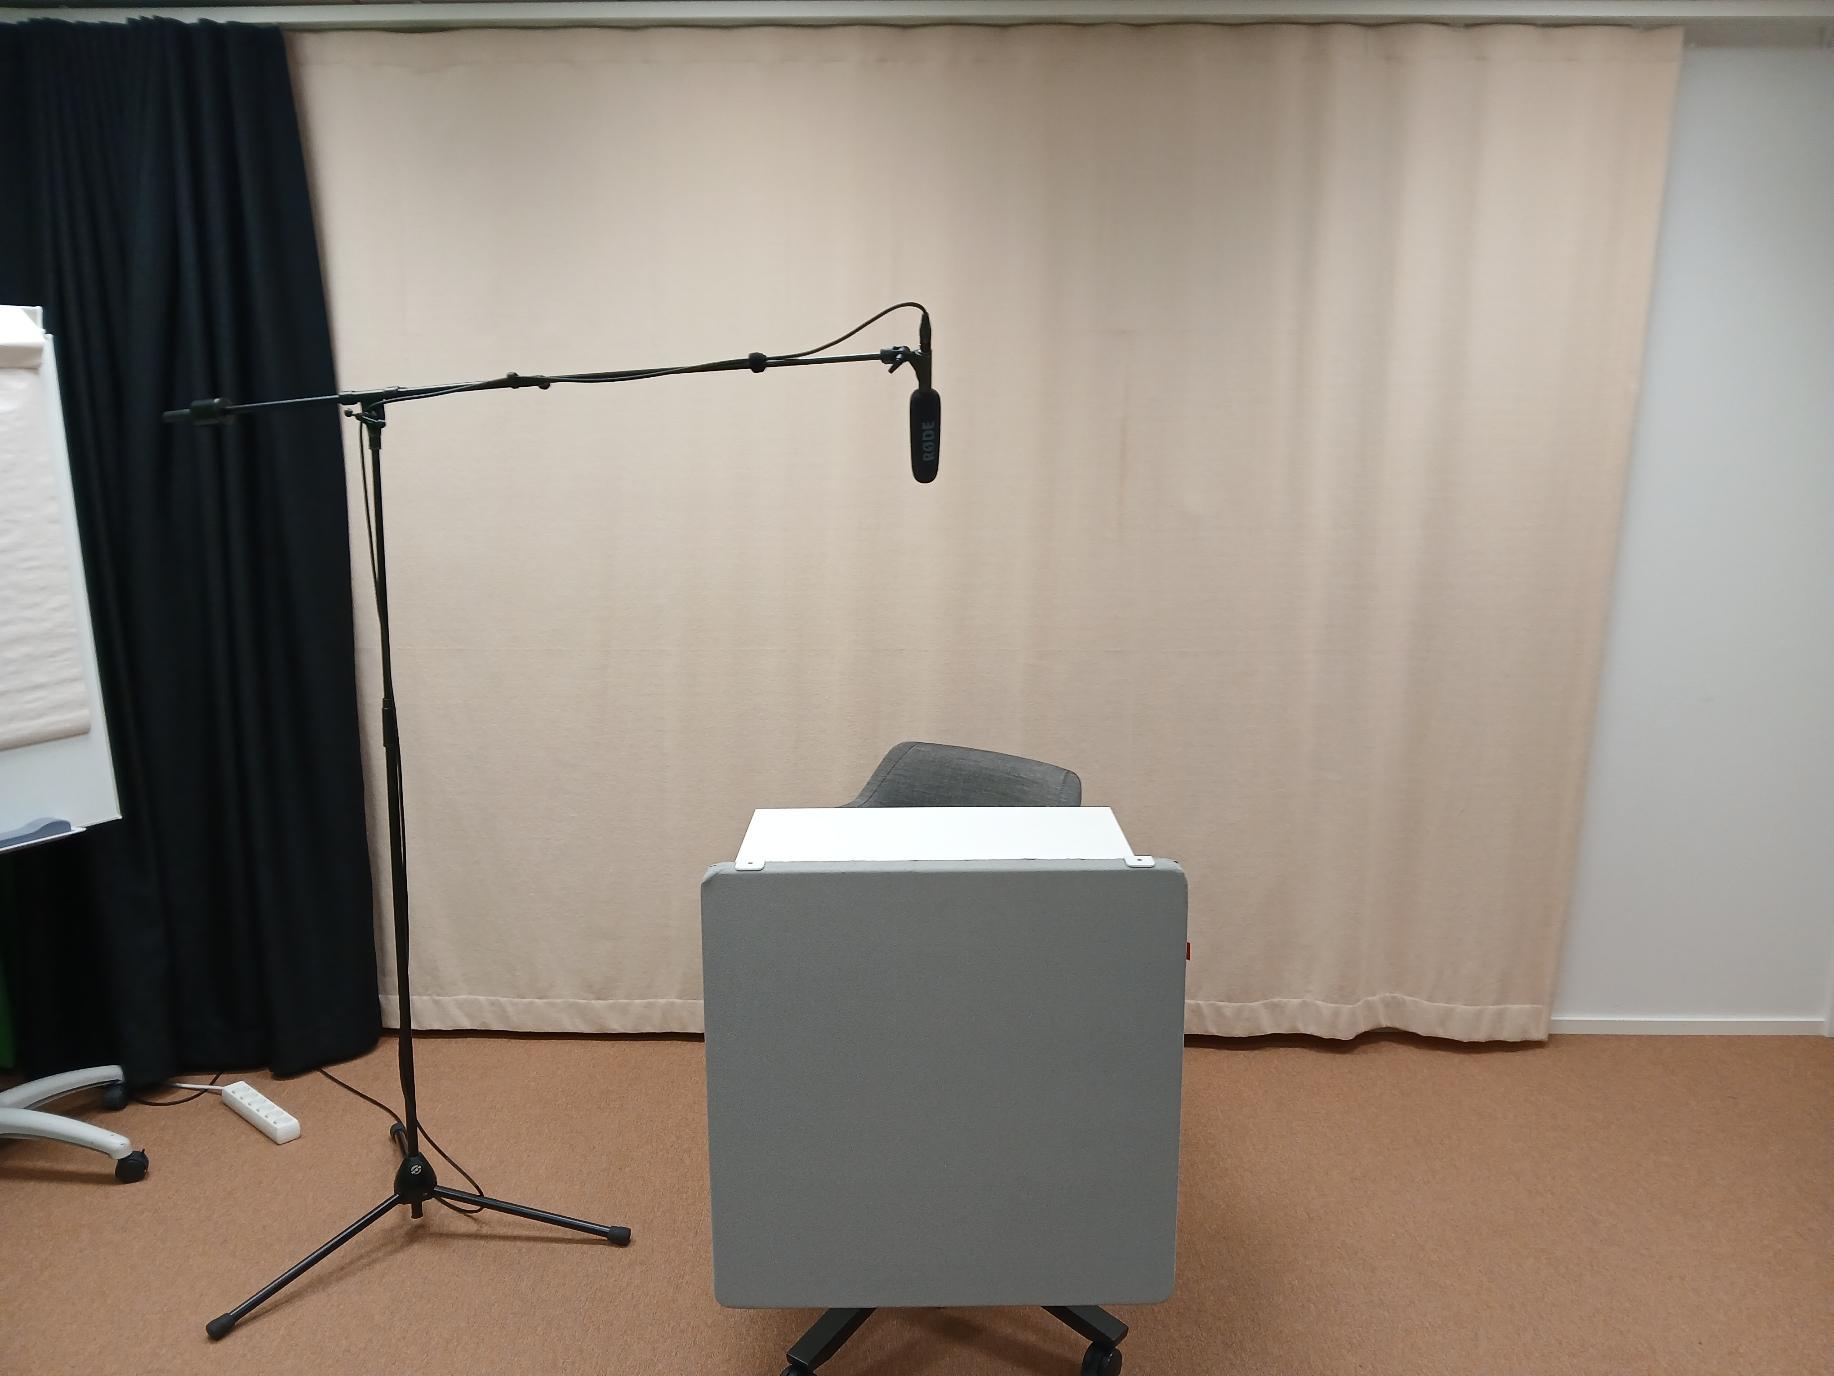
You can use either the black or white backdrop curtain on the control room wall as your recording background. Opposite the backdrop wall is a Panasonic studio camera, which will power on after you switch on the POWER switch located on top of the equipment rack. You can adjust the camera angle and framing using the tripod controls and the camera's zoom button. Turn on the monitor located on top of the cabinet using Remote Control 1 so that you can use it to monitor the camera image.
Activate the microphone of your choice (either a headset microphone or the overhead microphone) and verify that audio is being received by checking the touchscreen display of the Epiphan recorder. When the microphone is working correctly, the audio level meter at the bottom of the screen will move in sync with speech. From the Epiphan recording device's layout menu, select the desired camera view or a combination of the camera feed and computer content. Press "Back" to return to the preview screen.
If you want to use the Vestel touch screen in the video, move it to a suitable place. Choose either PC (studio computer) or Laptop (if you have your own computer with you) as image source. For your own computer, there is a dedicated HDMI cable, labeled "Laptop". In addition to the touch screen, the studio computer can be controlled with a wireless keyboard and a mouse.
On top of the equipment rack, there is a Wyrestorm-branded video switcher. It is used to separately select which image is displayed on the Vestel screen and which image is being recorded. The button on the left switches the image on the screen and the button on the left switches the image to be recorded. The LEDs on the front panel show which one of the four image sources is selected. Each button press switches to the next source.
When you are ready, press the finger icon on the Epiphan recorder, and and start the recording by pressing “Start”. When you want to stop recording, press “Stop”.
Example 2. I want to shoot a video using Green Screen
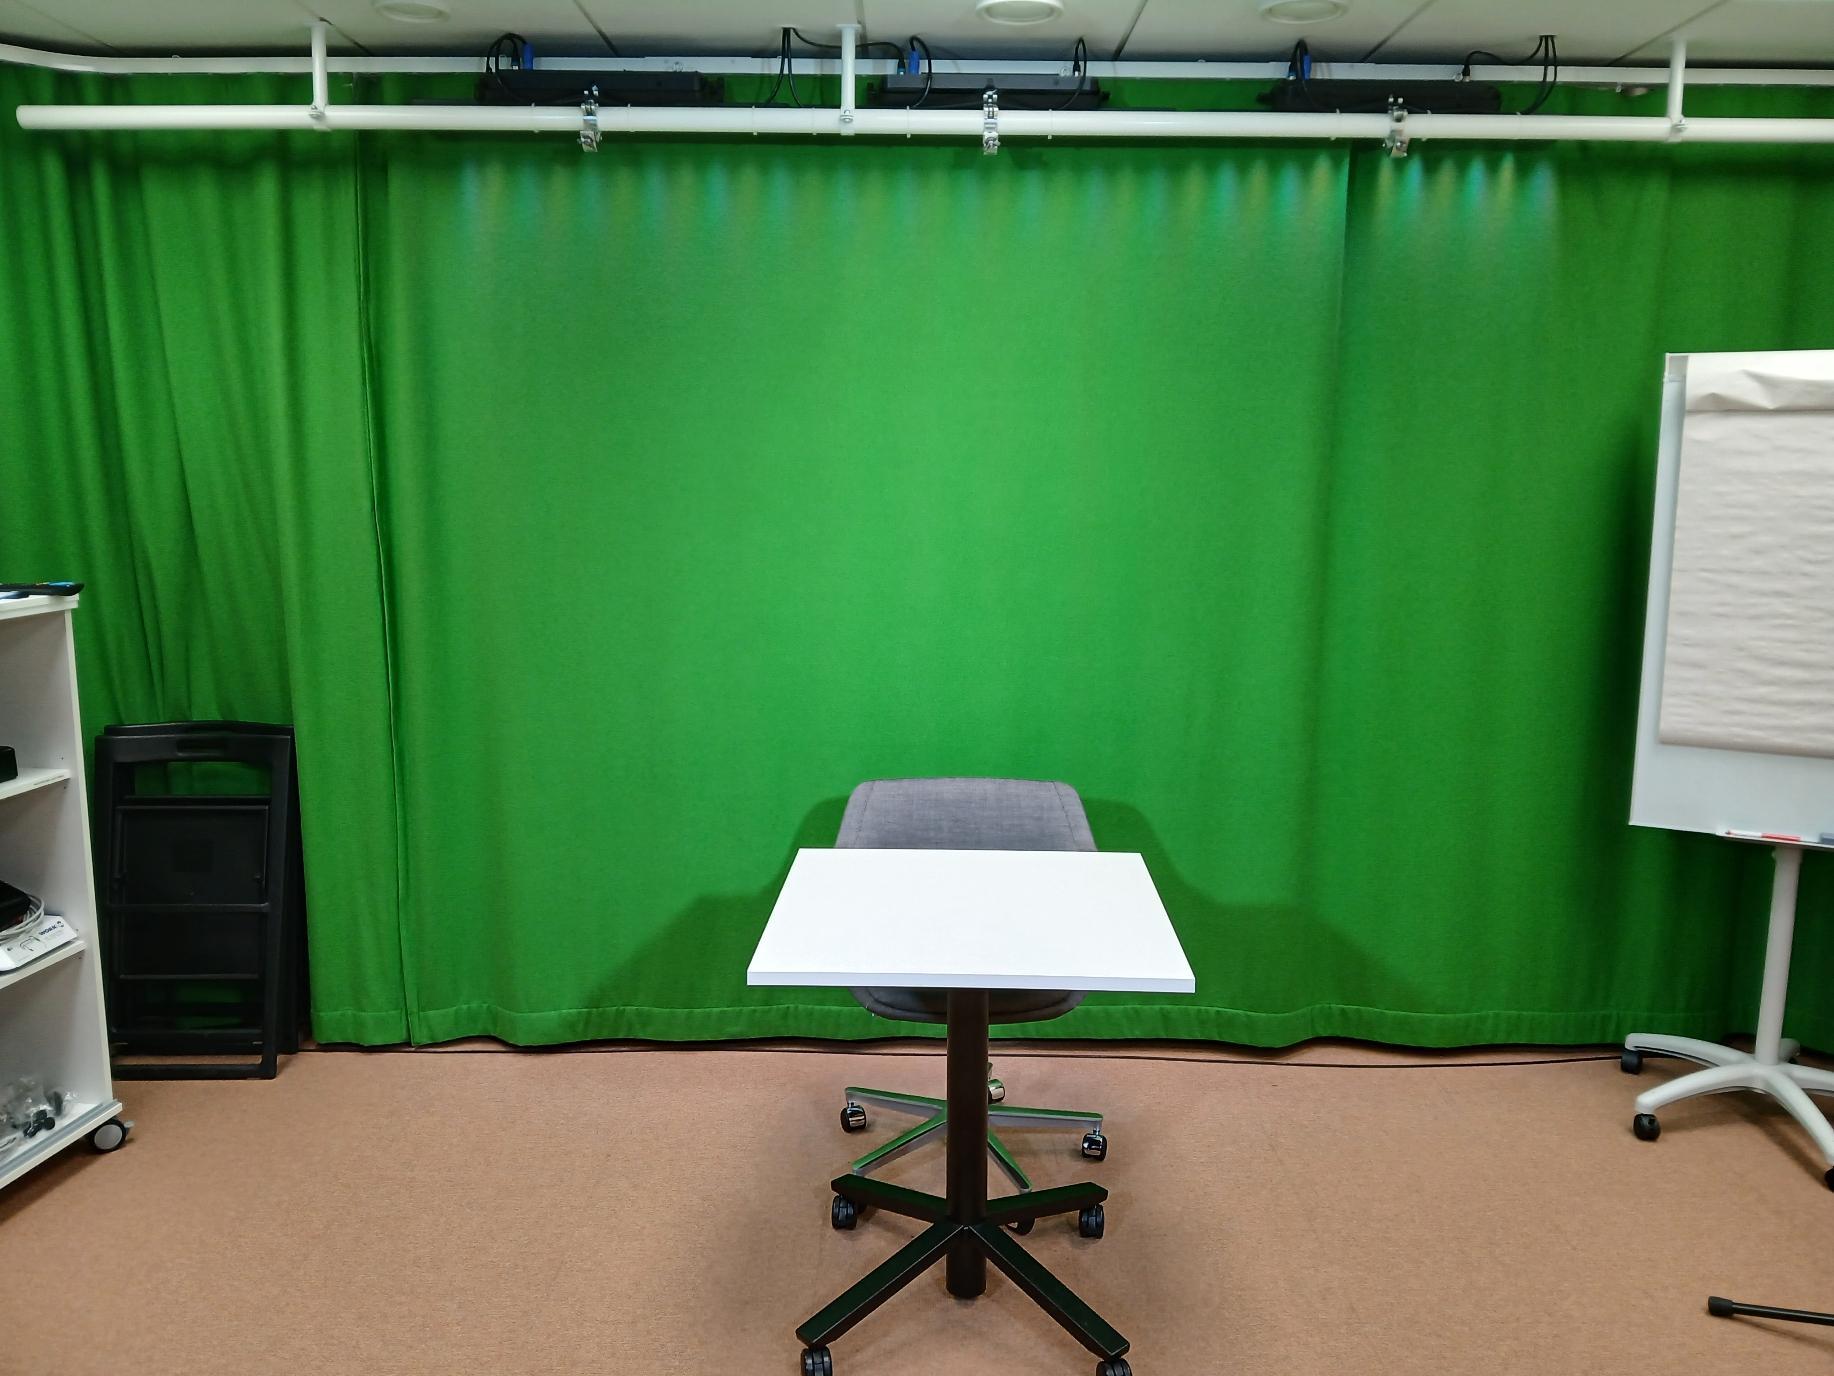
The remote-controlled, dedicated camera (attached to the ceiling) is used when shooting with the Green Screen option. The speaker must stand or sit in front of the green curtain (the long back wall of the studio). The best spot is where the studio lights are pointed at. Raise the "Master" slide on the lighting controller located on top of the equipment rack to the level marked with tape. In the Epiphan recorder's layout menu, select the last layout option (Green Screen). The green background will be automatically replaced in the recording with the computer's display output. Press "Back" to return to the preview screen.
Turn on the Vestel display with the remote control (1). Take the wireless mouse and keyboard for controlling the computer. When Epiphan is selected as source from the video switcher, you can see the finished Green Screen shot on the big screen. You can also control the computer through it. If you want to move the camera or zoom in/out, you can do it with the camera's remote control (3).
Turn on the power for the microphone you wish to use. Verify that audio is being received by checking the audio level meter on the recording device. The audio meter should respond to speech and move in sync with the speaker's voice.
When you are ready, press the "finger icon" and start recording by pressing “Start”. When you want to stop recording, press “Stop”.
Some tips for a succesful Green Screen shoot:
- Green-colored clothes would not work well on Green Screen video
- If you stand too close to the wall, you will cast shadows behind you and that can cause problems.
Example 3. I want to record a podcast
Take as many microphones as you need from the cabinet. Check separately for every speaker, that the sound meter of Epiphan recorder is moving.
When you are ready, press the "finger icon" and start recording by pressing “Start”. When you want to stop recording, press “Stop”. If you only want to publish the audio recording, it doesn't matter which camera you choose. The video track can be left unpublished.